Pages

Sunday, July 21, 2013

745.92 (Floral Arts)


The photo above represents what we learned in Wilton III this week - how to make gum paste carnations, roses, and calla lilies.  By far my favorite are carnations, although they're the most tedious to make. I'm not fond of the calla lily, so I didn't make more than one. I think that each of the flowers has a charm to them and that they make ordinary cupcakes something fantastic.


I've also been practicing with my camera and photo light box recently and I'm getting better at the photo taking. I really do love the way the gum paste carnations look - they seem so life like! I broke my veining tool making them, though. I'll need to buy a new one before class on Friday.

The cupcakes pictured are lemon cake with raspberry filling and a raspberry buttercream. I'm sure they'll be much appreciated at work tomorrow morning.


Sunday, July 14, 2013

641.86539071 (Cake Decoration, Education)

I started the Wilton III course this Friday. While most of class was pretty boring (rehashing gum paste and fondant use and doing a LOT of prep work for gum paste flowers), I did learn one useful skill that I immediately put to use: bow making.


50/50 Fondant and Gum Paste Bow on Buttercream Ruffle Cake


This was also my first attempt at the ruffle technique for frosting a cake and I have to say that I'm pretty happy. Much like the rosette technique though, it takes about 1-1/2 recipes of butter cream to complete it. This cake is HEAVY. The bow I made isn't the typical bow for a Wilton class, either. It's thinner, one less layer of loops, and is wavy edged. I hated the bow I made in class, so I decided that I'd try again to make something I liked. I'm happy with this one.

Wednesday, July 10, 2013

Coming Soon...

I'm starting Wilton III on Friday this week. Look out world - there are some fondant and flowers coming your way!

Monday, June 17, 2013

306.8742 (Father-child relationship)

While I didn't get to spend Father's Day with my Popsi-Cola yesterday, I did make some cupcakes for the party at my Aunt Jan's and Uncle Gary's in honor of my Pop's Pop (my Grandpa) and got to test my homemade lighting rig for the first time.


Check out that photo! Not even edited! Following the "How to Make an Inexpensive Light Tent - DIY" tutorial written by Darren Rowse on the Digital Photography School blog, I made my own lighting rig using an old U-Haul box, white tissue paper, packing tape, and some leftover scrapbook paper. It looks something like this:

Lighting rig all set up.
The lamps are  from the local Wal-Mart (about $5 a piece) and I'm using daylight florescent bulbs/lamps in both. The rig is small enough that the box stores in a closet and the lamps just hang out in my kitchen until I need them again.

Lamps chillin' out of the way on the counter.
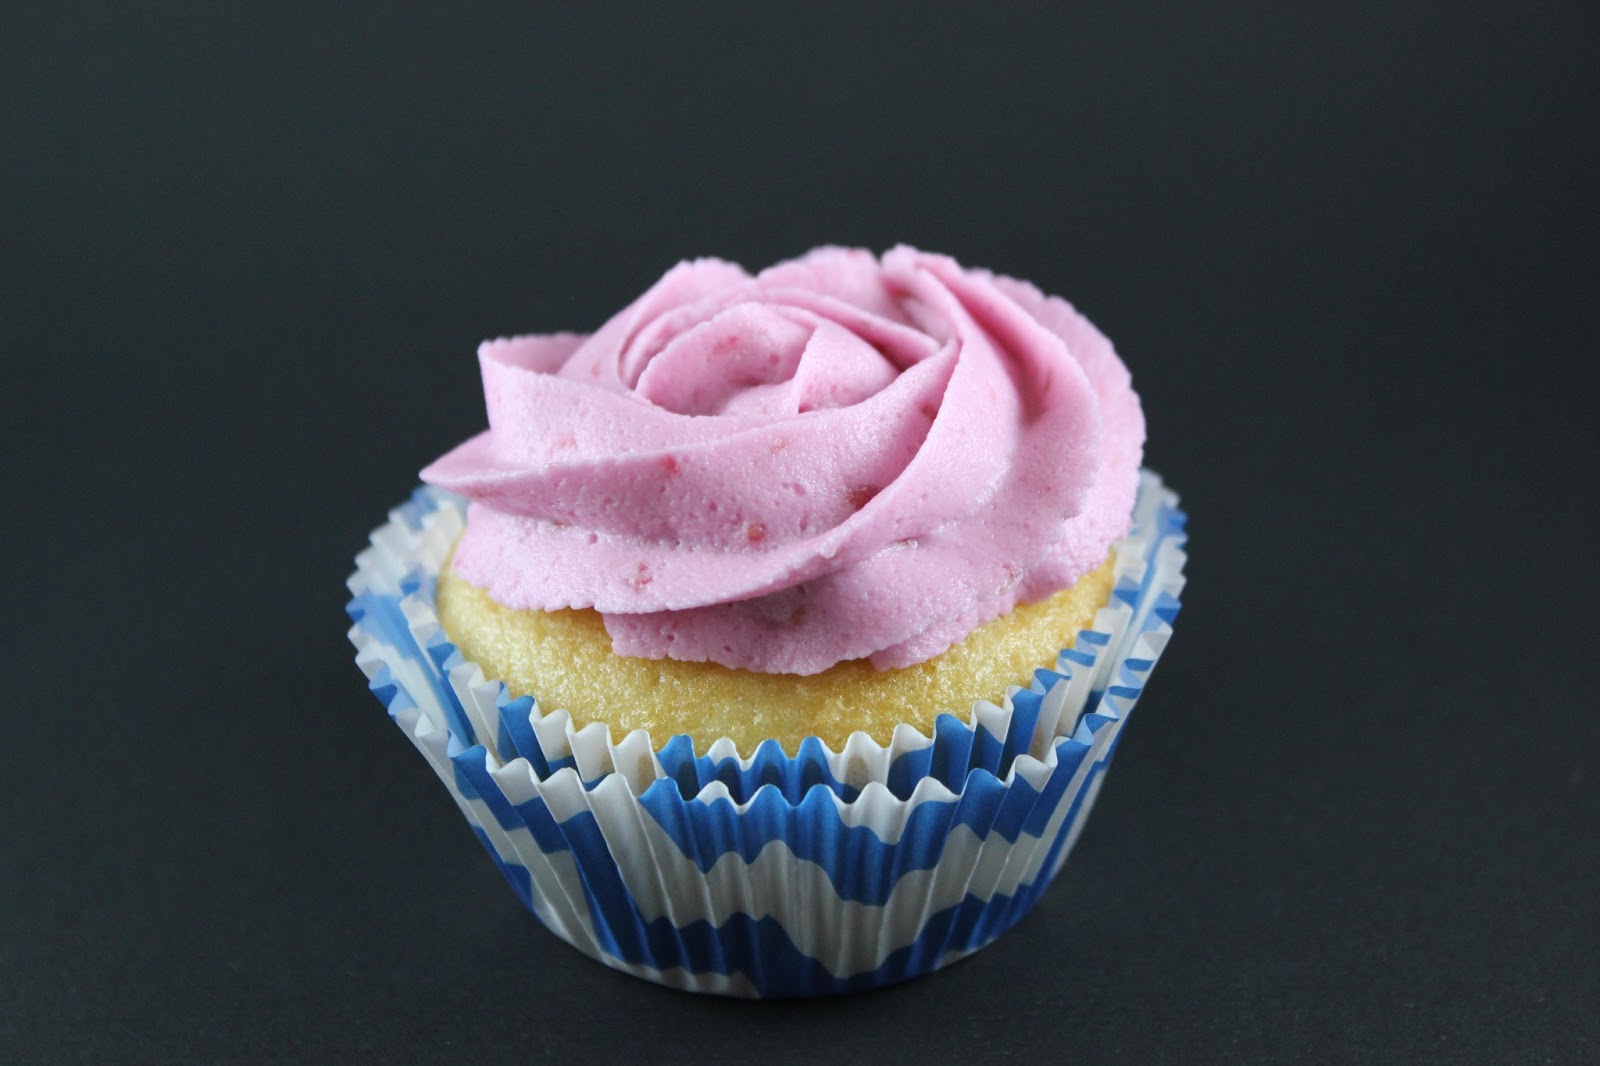
The cupcakes are simple white cake (with yolks in... I was lazy) with fresh raspberry butter cream frosting (we had leftover raspberries in the fridge). The design is just a simple rosette on top. So to conclude this post, a few more cupcake photos and some pictures of me and my Pops. What can I say, I'm a daddy's girl at heart.

Mmmm... raspberry butter cream!

Yes, two liners. It stops any oily marks from the cake and make it more delicate.

It takes quite a man to be a good father. I'm pretty sure that I've got one of the best!

Saturday, June 1, 2013

613 (Personal health and safety) - An "Oh Shit! Kit"

What is an "Oh Shit! Kit" you may ask? Basically, it's just a small package of all those things that you might need at an event that you are going to, namely weddings, but just everyday preparedness, too!

I have a small "Oh Shit! Kit" that goes in my purse along side my wallet and beauty products. This kit looks like this:

And it holds the following products:

  • Hand sanitizer
  • Tide-to-go mini stick
  • Mini floss (free from dentist appt.)
  • Band Aides (finger, knuckle, and regular fabric ones)
  • Hand wipes (these happen to be from a "wash your sins away" gag gift)
  • Pain pills, allergy pills, and Tums in a small Altoids container
  • Mint breath spray
  • Alcohol wipes
  • Jolly ranchers
  • Throat lozenges (cough drops)
  • Mini sewing kit (with two needles, thread, two buttons, two safety pins, and a small scissors)
  • Mini nail kit (nail clippers, file, cuticle scissors)
All of these things fit in the small American Red Cross pouch. I also have a mouth-to-mouth shield attached to my key ring (it folds up into a little pouch) and my regular cosmetics (chapstick, lipstick, etc.) in my purse pockets alongside my cell phone.


Small "Oh Shit!" Kit Contents

My large "Oh Shit! Kit" that I take to weddings and on long weekends/camping/etc. fits inside a medium sized cosmetic bag (with the internal, clear zippered pockets) and looks more like this:

Large "Oh Shit!" Kit Contents

It has a longer list of things included by far and is still being added to on a regular basis as I find new items that I think should be added. The larger kit includes:

  • Instant ice pack
  • Throat lozenges
  • Wet wipes (good for more than just babies' bottoms)
  • Static guard
  • A mini lint roller
  • Sewing kit
  • Tide-to-go stick
  • Alcohol wipes
  • Gauze
  • A larger assortment of pills (pain, Tums, cold and sinus, allergy)
  • Neo-to-Go spray (well, the cheap target version that works just as well)
  • Double sided fashion tape
  • Safety Pins
  • Larger scissors
  • Q-Tips
  • Tampons
  • Blister Band Aids
  • Assorted fabric Band Aids
  • Clear medical tape
  • Pens
  • Floss
  • Whips (4 little throw away tooth brushes that have picks on the end)
  • Carmex stick
  • Tape measure
  • Paper clips
  • Mini manicure set
  • Lavender scented hand lotion
  • Mint breath spray
  • Jolly ranchers
Why carry all of this stuff, you might ask? Because I've needed it before and not had it! Some of the most common problems I run into at weddings or large group events? A bride who wants hand lotion or a breath mint, groomsmen who rip their hems, a bridesmaid who forgot their chapstick or breaks a nail (or whose shoes are killing her feet and causing blisters... I've had that one happen myself), or a various number of small cuts and scrapes happen throughout the day. I always feel like an assortment of over-the-counter drugs are a good way to go, too - you never know when someone in the crowd will get a headache or be sneezing uncontrollably from seasonal allergies. The jolly ranchers? I know an awful lot of people who are diabetic and a piece of hard candy can fix a lot of sugar/insulin issues. 

Does this make me "mom" among my friends? Yes, yes it does. While that can be annoying, it's also good to know that everyone in the crowd is taken care of. Anything else you think should go in my "Oh Shit! Kits"? Leave a comment below!

Monday, May 27, 2013

394.262 (Secular holidays - Holidays of March, April, May) - A Memorial Day Post

My mother's church has an annual Memorial Day bake sale. The church sits right on the parade route, so as long as the weather is decent (which sometimes happens in Wisconsin), they do pretty well. Since I was in town for a surprise party that day, she asked me to bake some cookies for the bake sale.

I've been wanting to try the "stained glass" cookie technique for a while, so here are the awesome results!


The hubs helped with these cookies, for which I was EXTREMELY thankful. They're kind of a pain!

I made my normal sugar cookie dough (the one out of the Betty Crocker (c)1973 cook book) and cut out stars using two different sized cookie cutters. After a little SCIENCE!, the hubs and I discovered that the best way to make them without either a) the candy melting too fast and then becoming bubbled and burnt or b) the dough being under cooked was to follow the steps below:
  1. Bake the cookies for 2-3 minutes on the parchment paper lined sheet before adding the candy.
  2. Remove the cookies from the oven and add "large-ish" chunks of jolly rancher to the center of the cookie, using more candy than you think you'll need to ensure complete coverage of the inside of the cookie. Also, doing this carefully so no candy ends up on the dough itself, but stays on the inside of the cookie.
  3. Bake until all of the candy has melted (another 3-5 minutes) and the cookies appear a little brown around the edges.
  4. Use a toothpick to quickly (and carefully) spread liquid candy to any blank spots.
Instead of wasting or re-rolling the middles I cut out of the cookies, I baked the middles and then frosted them with a simple pour-frosting (Wilton recipe).

They definitely turned out beautifully, though! I've got to hand that to them! And if you like jolly ranchers, they're pretty taste-y, too!

A few more pictures for posterity, right?

Cooking in the window - I love the reflection on the window sill!

Cookies in my mother's antique glass bowl. Aren't they patriotic?

Closeup on my favorite cookie of the batch - I love the way the color swirls!

Friday, May 17, 2013

793.2 (Parties and entertainments)

I just hosted a bridal shower for my best friend and her future hubby, and with the help of my mother and the bride and groom's mothers, we turned a basement room of a local art museum into a cheery, "Breakfast at Tiffany's" themed shower space.

 I bought vases, beads, and tiny square mirrors at our local Dollar Tree to create 10 small centerpieces to decorate the tables using dyed daisies, carnations, and baby's breath.


I purchased "high quality" plastic silver ware and plates from Party City. I then baked and decorated sugar cookies, which I packaged in paper CD sleeves and tied with black and white bakers twine. Silver chargers (left over my my own wedding almost 3 years ago) were used to complete the place settings.


When we arrived at the museum, my moms (my actual mother and my "other mother", the bride's mother) discovered that the tables weren't the size we thought they were - we were expecting tables that sat 8 and these tables sat 6. We had to go out and buy some tablecloths last minute... and since Manitowoc (where we hosted the shower) doesn't have a Party City, we couldn't match the Tiffany's blue of the other tablecloths I purchased). It wasn't as pretty as I would have liked, but it worked.


And of course I made a cake and cupcakes for the party! How could I not!?! The cupcake tower is made out of aluminum covered soup cans and foam core board covered with craft paper and ribbon. It was cheap and easy and could hold almost 40 cupcakes.


The small orange and white cake had a blue ombre interior, which I didn't get a picture of before the cake was eaten and destroyed, and the cupcakes were chocolate with simple vanilla buttercream. I had a mixture of paper and foil liners on the cupcakes, as I was using the leftovers from other projects.


I made three floral "puffs" that I placed on chargers and mirrors at the center of the buffet table. They're a little hard to see in this photo (it's white against a white background) but they were very effective at making the buffet table look pretty. My black and white damask tablecloth that I usually use for summer picnics came in handy to cover the extra long buffet table.

All in all, it was a successful shower with delicious food and good company! One less activity to cross off my list before the wedding in June... now if only the table runners and bridesmaid clutches would sew themselves...